
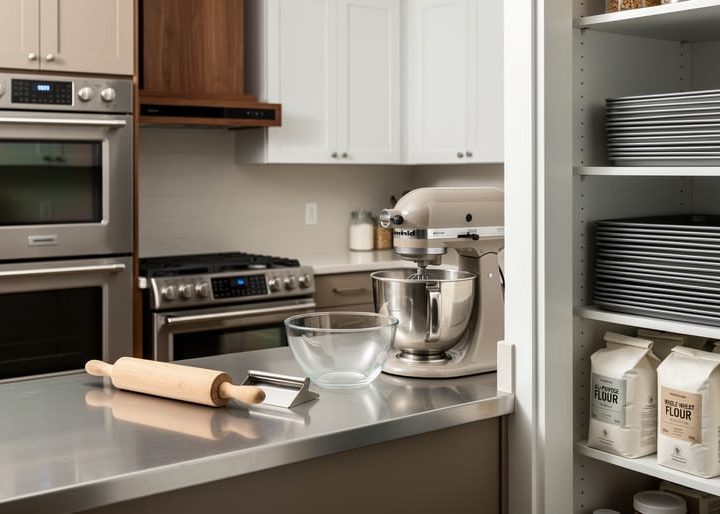
Optimizing your kitchen for serious home baking comes down to three essentials: positioning your workspace near power sources and counters, choosing a double wall oven or convection range that fits your baking volume, and dedicating at least 40% of your storage to flour, mixers, and pans. If you bake more than twice weekly in your Kitchener home, you’ve probably already felt the frustration of juggling sheet pans on a single oven rack or hunting for your bench scraper buried in a drawer of spatulas.
The shift from casual weekend baker to committed home baker changes everything about how your kitchen needs to function. Your layout suddenly matters because you’re no longer just pulling out a mixer once a month. You need counter space that stays clear, storage that keeps ingredients fresh through our humid Ontario summers, and oven capacity that handles multiple temperature zones when you’re baking sourdough while proofing croissants.
I learned this the hard way three years ago when I tried to prep Thanksgiving dinner alongside a standing cookie order. My single oven became a bottleneck, my 20-pound flour bag sat on the floor because I had nowhere to store it, and my mise en place sprawled across every available surface. That day taught me that great baking isn’t just about technique. Your physical space either supports your goals or constantly works against them.
PD Home Renovations, led by Paul frequently works with local bakers who want to reconfigure existing kitchens without gut renovations, and the pattern is clear: small, strategic changes to layout and storage deliver outsized results. You don’t need a commercial kitchen. You need a home kitchen that thinks like one.
What You’ll Need to Plan Your Baking Kitchen
Before you start rearranging cabinets or shopping for ovens, gather the right planning tools. You’ll save time and avoid costly mistakes if you document your space properly and think through your needs first.
Start with the basics for measuring and recording your current kitchen. You need:
- A measuring tape (25-foot length works well for most kitchens)
- Graph paper or a digital planning tool like SketchUp or a simple kitchen planner app
- A budget worksheet to track costs and prioritize upgrades
- Appliance dimension specs from manufacturer websites for items you’re considering
- A wish list of baking equipment ranked by how often you’d actually use each piece
Beyond the physical tools, collect some information about your space. Check your electrical panel to see how many circuits you have available. Kitchener homes built before 1990 often need electrical upgrades before adding a second oven, so knowing your capacity now prevents surprises later. Take photos of your current kitchen from multiple angles. These become invaluable when you’re planning but can’t stand in the kitchen measuring.
Create an inspiration file, but be selective. Pin or save images of kitchens that match your actual space size and budget, not just beautiful professional setups. I kept a folder of realistic home baker kitchens and found it more helpful than drooling over magazine-worthy designs I could never afford.
Finally, make notes about your baking patterns for the past few months. What do you bake weekly? Monthly? What’s always cramped or awkward? This informal assessment guides every decision that follows and keeps you focused on improvements that matter for your specific baking life.
Important Considerations Before You Redesign
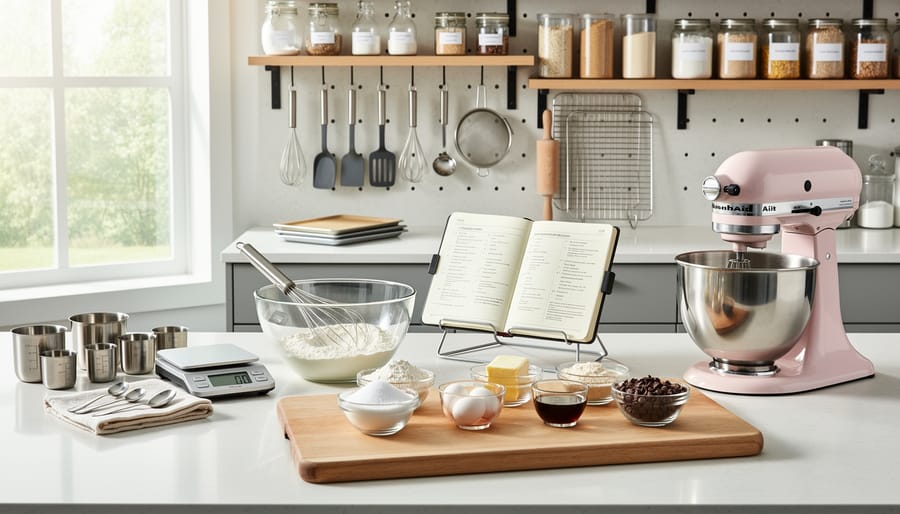
Before you start sketching layouts or shopping for that double wall oven you’ve been eyeing, let’s talk about the less exciting but absolutely essential groundwork. I learned this the hard way when I nearly overloaded my electrical panel trying to run two ovens and my stand mixer simultaneously during a big holiday bake.
First, your electrical capacity needs serious attention. Most Kitchener homes built before 2000 have 100-amp or 150-amp service, which sounds like a lot until you realize a single wall oven can pull 20-30 amps. If you’re planning multiple ovens or adding a commercial-style range, your current panel might not handle it. Check your main breaker box and count your available slots.
Ventilation matters more than most home bakers realize. Ovens produce heat and moisture, and if you’re baking several batches a day, that humidity accumulates fast in Kitchener’s already variable climate. Your existing range hood might not cut it for serious baking volume. Look for hoods rated at minimum 300 CFM if you’re running multiple ovens, and make sure they vent outside rather than recirculating.
Don’t underestimate weight loads either. A 20-quart stand mixer filled with bread dough weighs around 60 pounds, and that’s before you account for marble pastry slabs or stacks of sheet pans. Standard countertops handle this fine, but if you’re installing open shelving or considering a kitchen island, verify it’s structurally sound for heavy equipment.
Budget reality deserves its own paragraph. A functional home baker’s kitchen redesign in Kitchener typically runs $8,000 to $25,000 depending on scope, and that’s with homeowner-grade appliances, not professional equipment. Get three quotes, build in a 20% contingency, and know which upgrades you can phase in over time versus what needs doing all at once.
Step-by-Step: Designing Your Home Baker’s Kitchen
Step 1: Assess Your Current Space and Baking Habits
Start by standing in your kitchen right now and watching yourself work through a typical baking session. I did this last year before my own redesign, and it was eye-opening to realize I walked back and forth to the pantry seventeen times while making one batch of cookies.
Grab a notebook and track your movements for your next three baking projects. Where do you mix? Where do you rest dough? Where does everything pile up when you’re juggling multiple projects? Those traffic jams and awkward reaches are your pain points, and they’ll tell you exactly what needs fixing.
Next, get honest about what you actually bake. Do you bake cupcakes weekly for your kids’ school events? Are you a sourdough baker who needs long counter stretches for shaping loaves? Maybe you’re deep into pastry work that demands serious chilled workspace. Your regular rotation matters more than aspirational projects you tackle twice a year.
Ask yourself these questions: How many days a week do I bake? Do I work on multiple items simultaneously? What’s my largest batch size? Which tools do I use every single time versus occasionally? What ingredients do I buy in bulk?
Write down your answers. This honest assessment creates your design brief, because a kitchen that works brilliantly for someone cranking out wedding cakes will frustrate a bread baker, and vice versa. Design for your reality, not someone else’s.
Step 2: Choose Your Layout for Optimal Workflow
Your ideal layout depends less on a formal kitchen shape and more on how you move through a batch of baking. Think about your muffin workflow: you gather ingredients, mix them, fill pans, bake, cool, and store. Each step needs its own zone, and they should flow in that order without backtracking across the room.
The classic kitchen work triangle connects sink, stove, and fridge. For bakers, adjust it to prep station, mixer zone, and oven, with each leg no more than four to six feet apart. Your prep station lives near the fridge and pantry where you gather ingredients. The mixer zone needs a sturdy counter or dedicated stand, ideally within arm’s reach of your prep area. Your oven anchors the hot zone, and you’ll want at least two feet of heatproof landing space beside it for pulling pans out.
Counter space matters more than you’d guess. Budget at least three feet of uninterrupted work surface for rolling dough, plus separate landing zones near your mixer and oven. In Kitchener’s typical older homes with galley or L-shaped kitchens, this often means adding a rolling island or converting an underused dining corner into a baking station.
Your cooling zone gets overlooked in most kitchen plans, but it’s crucial when you’re running multiple batches. Position wire racks near the oven but out of the main traffic path. I use a bookshelf-style baker’s rack in the corner by my back door, which keeps hot pans away from the central workspace and catches the cooler air near the exterior wall during Kitchener’s summer baking sessions.
Step 3: Select and Position Your Oven(s)
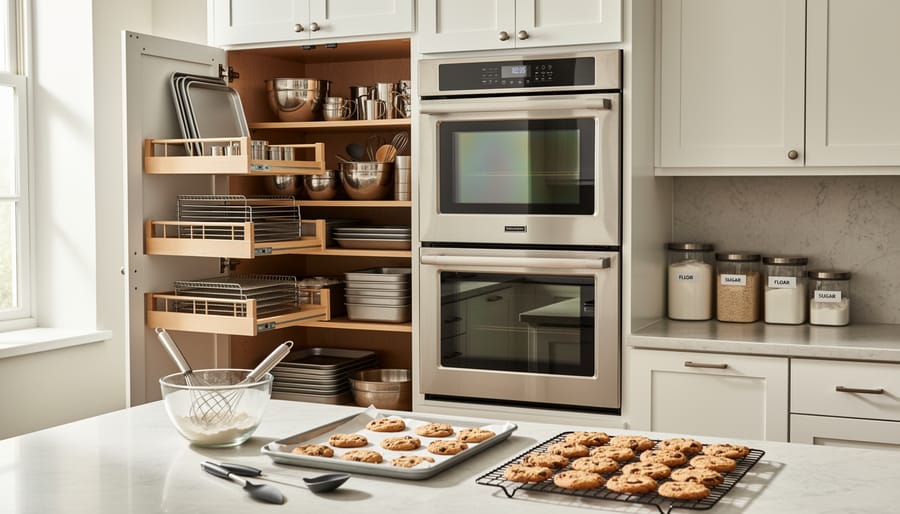
Your oven choice will make or break your baking rhythm. I learned this the hard way when I tried running a double batch of croissants and two birthday cakes simultaneously in my single 24-inch oven, the temperature swings were a disaster.
For occasional weekend bakers making one or two items at a time, a single 27 or 30-inch wall oven works beautifully. You’ll get consistent heat, and most models fit standard cabinet cutouts. If you’re baking multiple items weekly or experimenting with different temperatures (cookies at 350°F while proofing bread at 80°F), a double oven setup changes everything. I now run my convection oven on top for pastries and the conventional below for breads, and it’s transformed my oven timing.
Here’s what actually matters: convection ovens circulate air with a fan, creating even browning and faster baking, ideal for cookies, puff pastry, and anything you want crispy. Conventional ovens heat from bottom elements, which works better for crusty bread, custards, and items where you don’t want surface drying. Most serious home bakers benefit from having both options, either in a dual-fuel range or a double wall oven where one offers convection.
Position your primary oven at a comfortable height, I installed mine so the middle rack sits at my elbow level, eliminating the back-breaking bend of checking tart crusts. If you’re adding a second oven, stack them vertically rather than side-by-side to keep your baking zone compact. Leave at least 15 inches of counter space on one side for hot pans (trust me, you need that landing zone).
Don’t get seduced by modern oven history or fancy steam injection features unless you’re committed to artisan bread. Focus on accurate temperature control and interior capacity first, a basic oven that holds temp beats a feature-loaded one that runs hot and cold.
Step 4: Design Your Storage Solutions
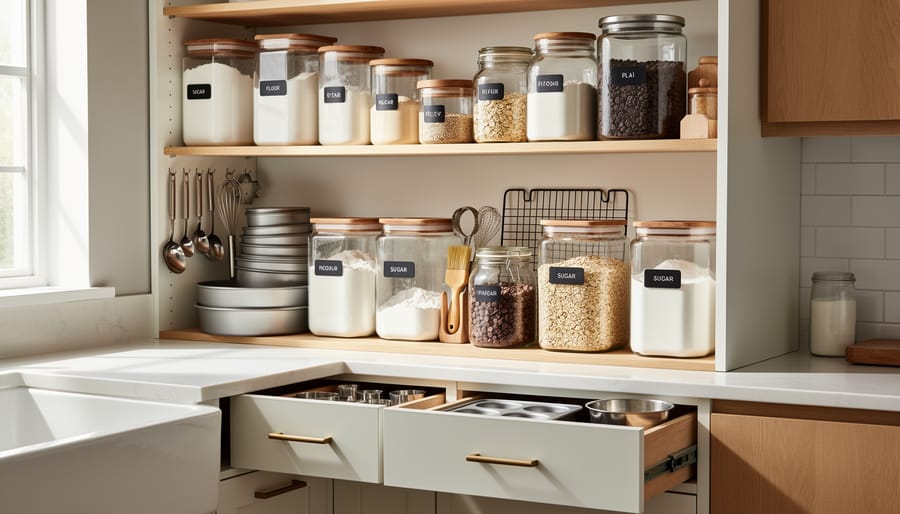
Start with your bulkiest items: flour and sugar bins need a cool, dry spot away from your oven’s heat. In Kitchener, where summer humidity can spike and winter heating dries everything out, I keep my bulk ingredients in airtight containers inside a base cabinet with a moisture-absorbing packet tucked in the back. Containers with pour spouts make measuring faster, but avoid storing them near the dishwasher or sink where steam accumulates.
Every functional baking kitchen needs these dedicated storage zones:
- Bulk ingredient storage in airtight containers, positioned away from heat sources
- Baking pan vertical racks to prevent scratching and maximize cabinet depth
- Mixer storage with direct access to an outlet, so you’re not dragging a heavy appliance across the counter
- Cooling rack storage near your oven for quick access to your cooling setup
- Small tools drawer organized with dividers for measuring spoons, spatulas, and pastry brushes
Vertical storage transforms shallow cabinets. Install tension rods or file-folder-style dividers to stand sheet pans, cutting boards, and cooling racks on edge. You’ll find what you need without unstacking half your cookware. Pull-out drawers work beautifully for mixing bowls (nest them by size) and for heavy items like your stand mixer’s attachments.
Open shelving looks lovely and keeps everyday tools within reach, but Kitchener’s dust and the grease from cooking mean you’ll wipe down jars and canisters regularly. I use open shelves for items I grab daily and closed cabinets for everything else. A dedicated drawer for piping tips, cookie cutters, and small scrapers (with a simple silverware organizer) beats digging through a jumbled container every time you need a star tip.
How to Know Your Design Is Working
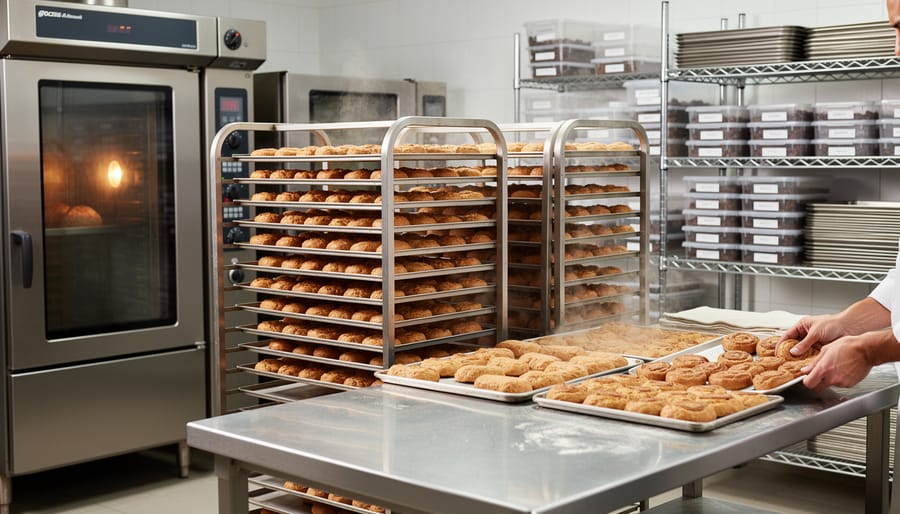
Give your new kitchen setup at least a month of regular baking before judging whether it truly works. You’ll know within the first few recipe cycles if something feels off, but some adjustments only reveal themselves over time.
Here’s how to systematically verify your design is functioning:
- Bake your signature recipe, the one you make most often, and pay attention to every movement. Are you walking back and forth unnecessarily? Do you have space to work comfortably at each stage? Note any moments when you felt cramped or had to search for a tool.
- Track your movement patterns during a full baking session. Imagine drawing lines on the floor between your mixing station, oven, and cooling area. If those lines crisscross constantly or you’re taking more than a few steps between key zones, your layout needs tweaking.
- Make small adjustments within the first month while everything is still fresh. Move that stand mixer six inches left, relocate your most-used pans to a different drawer, or swap the positions of your flour and sugar containers. These minor changes often solve major annoyances.
The real signs your kitchen is working? You’ll finish baking sessions feeling energized rather than exhausted from unnecessary steps. Clean-up becomes faster because everything has a logical home. You’ll start taking on more ambitious projects because your space supports rather than fights you.
Common adjustments I see home bakers make include adding a small rolling cart for flexibility, installing under-cabinet lighting they initially skipped, or realizing they need one more outlet near their primary work surface. These tweaks are normal. My own kitchen has evolved three times in the past two years, and each small change made my baking more enjoyable.
If after six weeks something still frustrates you every single time you bake, address it. A truly baker-friendly kitchen should feel like an extension of your hands, not an obstacle course.
Common Questions About Home Baking Kitchen Design
You’ve measured your kitchen three times and browsed a dozen oven reviews, but a few practical questions keep nagging. Here are the answers to what I hear most often from home bakers in Kitchener who are planning their kitchen upgrades.
What’s the minimum budget I need to make meaningful improvements?
You can start with $500 to $1,000 for targeted upgrades like pull-out pantry shelves, better storage containers, and a quality countertop mixer stand. A full renovation with new ovens and cabinetry typically runs $8,000 to $15,000 in Kitchener, but you don’t need to do everything at once.
What’s the single best first upgrade for serious home bakers?
Better oven capacity wins every time. If you’re currently juggling batches because you can only fit two cookie sheets at once, upgrading to a larger or double oven transforms your baking efficiency more than any other single change.
Can I improve my baking kitchen if I’m renting in Kitchener?
Absolutely. Focus on removable solutions like freestanding shelving units, rolling carts for extra prep space, and stackable storage containers. Many landlords will approve a stand-alone convection oven if you agree to take it when you move.
How do I make a small kitchen work for serious baking?
Vertical storage is your best friend. Install ceiling-height shelving, use magnetic strips for metal tools, hang measuring cups inside cabinet doors, and invest in a fold-down wall table for extra prep space. I’ve seen 80-square-foot kitchens turn out wedding cakes with smart vertical organization.
Do I really need a double oven as a home baker?
Not necessarily. If you bake one type of item at a time or mostly on weekends, a single large convection oven works beautifully. Double ovens shine when you’re doing mixed baking (bread and cookies simultaneously) or preparing for events with tight timelines.
Should I hire a designer or DIY my kitchen layout?
Start by sketching your own plan based on your baking habits since you know your workflow best. Bring in a kitchen designer for a consultation (many offer two-hour sessions for $200 to $400 in Kitchener) to catch issues like electrical requirements or wasted space you might have missed.
The thread running through all these questions is the same: start where you are, improve what frustrates you most, and remember that even professional bakeries evolve their spaces over time. Your kitchen doesn’t need to be perfect on day one to support the baking you love.
Your dream baking kitchen doesn’t have to happen all at once. I’ve been tweaking my own setup for years, and honestly, it’s still evolving. Last month I finally added that pull-out drawer for my sheet pans that I’d been planning since 2023. The point is to start somewhere.
Pick one thing from this guide that will make your biggest pain point disappear. Maybe it’s reorganizing your flour storage this weekend, or sketching out a better oven placement for when you’re ready to renovate. Small changes add up, and each improvement teaches you more about how you actually bake.
Your kitchen should work the way you work, not the other way around. There’s no perfect template because your Saturday morning sourdough routine looks different from someone else’s weeknight cookie batches. Trust what feels right for your space, your budget, and your baking rhythm.
The best part about designing a home baker’s kitchen? You get to live in it, use it, and adjust it as your skills and interests grow. Your kitchen will grow with you, one batch at a time.